
Have you seen this adorable fabric basket tutorial in our archives (on the Home Love page)? It is has been one of our most popular tutorials, at least if you measure by the things that people are showing off in our flickr album. The tutorial is from Ayumi's Pink Penquin blog.
I think this little basket has been such a popular project because 1) it's easy! 2) it's a perfect scrap-buster, and 3) the finished project is something you can definitely use. I mean, who doesn't want a little more organization in their home?
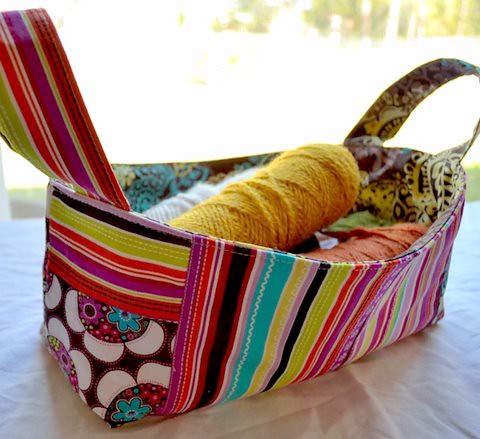
Here's the basket I made. And here's my disclaimer... I messed up big time and I totally love it anyway. First I must tell you that I decided to make it bigger so my measurements were not exactly what Ayumi tells you to use. Then I somehow got mixed up when I was sewing the sides together so what should have been the bottom of my basket ended up wrapping from one side around to the other. And the patchwork part ended up on the ends of the basket mostly. Can anyone really tell? Did it make it any less 'basketier' or any less cute? Certainly not.
Here it is holding some of my fall-colored yarns.

In case you're wondering, those darling prints were provided to me by the Fat Quarter Shop. Such sweet sponsors we have on this site!

This cute little school-themed basked submitted to our flickr group by 'Sunshine Sews' is perfect for this time of year. I can imagine it filled with school supplies as a perfect teacher gift. Thank you for the idea, 'Sunshine'!
And Grandma G., in case you're reading this and wondering why I'm not showing off your darling baskets, I tried but your flickr photos are protected from downloading. Everyone will just have to visit our flickr album to see the two baskets (different sizes!) made by our fan Grandma G.

It was super easy, just about 6" of FOE folded over and tied about an inch from the end. It didn't hold her long, thick hair by itself (there's a regular hair elastic underneath) but later I tried one on my curly headed Cadie and it worked perfectly without anything else. Plus Cadie liked how gently it held her hair.
Happy sewing everyone,

No comments:
Post a Comment