Thursday, August 30, 2012

Making the One Hour Bag


Earlier this year we had a sew-a-long making this adorable purse. It was tons of fun but since we didn't have a blog back then, I didn't get to show off the beautiful bags that everyone made.

The tutorial we all followed (to one degree or another) is Ric Rac's One Hour Bag. The link to this tute is also found on our 'All Patterns and Tutorials' page under the 'Self Love' category here.


This is my bag. I used a home decor weight jacquard for the exterior and some Amy Butler Love for the lining and one side of the strap.


My favorite part is the way the strap goes on. Instead of having to put it between the bag and the lining, you sew it on afterward. Then you put big fabric covered buttons over the stitching. At least I used big fabric covered buttons.

And I put a magnetic snap on the inside.


Here's a bag sewn by my friend Angie. She also used big buttons (and fussy cut the fabric first - adorable!). She added a strap closure to the outside.


This one was sewn by my friend Andrea. Such cute fabric!


And the rest of these were sewn by other Sew Can She fans...


by Svalgoma


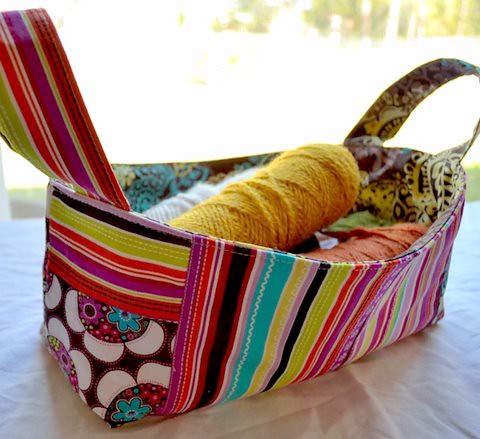
by handmade by jessica


and by outbutnotoutdone.


What have you made using tutorials we've featured? Post your pics in our flickr pool. Maybe you'll see them on the blog sometime!


Here's just a little pic from my Instagram today... 


It's my daughter Cadie with her bestie Katie (both pronounced the same). They fight way more than play nicely. We hope that if we keep telling them they're best friends it might be true by the time they're 7 or 8. :)


Happy Sewing, 
post signature

Monday, August 27, 2012

Sewing Ruby's Simple Washcloths


I have a baby shower coming up on Saturday so I thought I'd try out Ruby's adorable Simple Washcloth Tutorial. It's also in our 'Home Love' archives here.

Oh my goodness, what fun! I have tons of cotton fabric around, but I had to make a trip to the big-box fabric store for the cotton chenille. With a coupon I got 1/2 yard for under $3. Yay! 


When I got home I realized that the pale blue chenille (the baby is a boy) would look just lovely with my organic cotton scraps from my last Fabricworm project. 


The biggest change (if you could call it that) I made to this tutorial was using a 7" inch template instead of 6". I really like the size. Maybe I am too used to cutting squares with a ruler and rotary cutter, but this tracing and 'sloppy' cutting was a blast. I could even watch TV and do it!

So here are my 'supplies' all set up next to my machine. Sewing them up was a breeze.


My only annoyance came during the topstitching. I insisted on sewing them with the quilting cotton side up even though my feed dogs didn't work very well with the chenille on the bottom. I thought using my walking foot would help, but it didn't :(. I know, I should have just tried turning them over, but I'm stubborn.


I'm so excited to give these away on Saturday and hear everyone ask, 'you made these???' 


post signature

Friday, August 24, 2012

Oilcloth Pencil Cases - My Version :)


We've only had 2 weeks of school, but I can already tell that my kids have been assigned really great teachers this year. So even though teacher gifts are usually given in the spring, I wanted to give them something now. Hey, why wait until the end of the year to sweeten them up?

 The original tutorial is on Miss Make's blog here and archived in our 'Crafty Love' section. Be sure to read that because I'm not going to show every step, just the ones that I changed.


Interruptions


This is one of those 'while you're at it' projects that is so quick to make you might as well sew more than one. I cut out and stitched up 6 in just a couple hours... with interruptions. 


Laminated fabric or oilcloth (as it is also called) has a thin layer of vinyl fused to the right side. It is different from PUL, which has the vinyl on the wrong side. They're both pretty handy (for different things) and since they're laminated on one side, they won't fray at the edges.


This fabric is a super 58-60" wide, but the laminate doesn't always make it all the way to the selvage, so you'll have to trim the edges where there's no vinyl.


Here's where I started to deviate from Miss Mary's tutorial. Instead of cutting two pieces of oilcloth for each pencil case, I just cut one and planned to fold it at the bottom of the case. I know, lazy. I'm just getting started.


Next, instead of folding the edge over and sewing it to the top of the zipper, I placed the open zipper on the top of my oilcloth piece and stitched them right sides together.

Lazy alert: I don't have a sewing machine foot fetish that makes me change feet all the time, so I just used my regular foot here. I moved my needle over to the left and then sewed with the edge of the foot against the zipper. Do whatever works for you and helps you make a straight line.


You will have to close the zipper about half way down so you can finish stitching without your zipper pull getting in the way.


Then, if you are using my method, fold the other end of the oilcloth up and sew it to the right side of other zipper tape.


I put a folded piece of ribbon in one side seam to make a little loop for hanging or whatever.


If you want the top of your zipper to stick up and form a square corner like mine, be sure to fold the zipper tapes up before you stitch your side seams.


And there you go. These are perfect for pencils, markers, crayons, or whatever doo-dads you can think of.


Happy back-to-school,

post signature

Wednesday, August 22, 2012

Ayumi's Darling Fabric Basket Tutorial


Have you seen this adorable fabric basket tutorial in our archives (on the Home Love page)? It is has been one of our most popular tutorials, at least if you measure by the things that people are showing off in our flickr album. The tutorial is from Ayumi's Pink Penquin blog.

I think this little basket has been such a popular project because 1) it's easy! 2) it's a perfect scrap-buster, and 3) the finished project is something you can definitely use. I mean, who doesn't want a little more organization in their home?


Here's the basket I made. And here's my disclaimer... I messed up big time and I totally love it anyway. First I must tell you that I decided to make it bigger so my measurements were not exactly what Ayumi tells you to use. Then I somehow got mixed up when I was sewing the sides together so what should have been the bottom of my basket ended up wrapping from one side around to the other. And the patchwork part ended up on the ends of the basket mostly. Can anyone really tell? Did it make it any less 'basketier' or any less cute? Certainly not.

Here it is holding some of my fall-colored yarns.


In case you're wondering, those darling prints were provided to me by the Fat Quarter Shop. Such sweet sponsors we have on this site!


This cute little school-themed basked submitted to our flickr group by 'Sunshine Sews'  is perfect for this time of year. I can imagine it filled with school supplies as a perfect teacher gift. Thank you for the idea, 'Sunshine'!

And Grandma G., in case you're reading this and wondering why I'm not showing off your darling baskets, I tried but your flickr photos are protected from downloading. Everyone will just have to visit our flickr album to see the two baskets (different sizes!) made by our fan Grandma G.

And my Instagram this morning... in the minutes before I ran Chloe out to the bus, we figured out how to make those FOE (fold over elastic) pony tail holders that I've seen all over the place.

It was super easy, just about 6" of FOE folded over and tied about an inch from the end. It didn't hold her long, thick hair by itself (there's a regular hair elastic underneath) but later I tried one on my curly headed Cadie and it worked perfectly without anything else. Plus Cadie liked how gently it held her hair.


Happy sewing everyone,
post signature

Monday, August 20, 2012

Welcome to She Sews! The Sew Can She blog.


Hello sewing friends! This is the first of many blog posts journaling our sewing adventures using tutorials from the Sew Can She website. Don't expect a new post every day, or every single featured tutorial to show up here as well... But we'll try to give you something fun to read a couple times a week. :)

Sew Can She is all about sharing talents, I feel. There are so many fabulously talented women out there who are willing to take the time to share their ideas and patterns for free. I absolutely love these gals. And I love it when I get to use their ideas to expand my own skills and create something for my family, friends, or myself!


So for this first post, I'm going to share some along-the-way pics from the Toddler Nap and Play Mat, which is one of the free patterns you got when you signed up for the Sew Can She Newlsetter (you can sign up above if you haven't already).

This project kind of has a funny story. We got a puppy for Christmas in 2011 and this naughty animal tore up every dog bed we ever bought him. Very soon I saw what dog beds were made of (fabric and polyfill) and got tired of paying $10 - $25 for these cheaply made 'beds.' 
After several tries (the first one made from an old pillowcase). I finally came up with a cute dog bed that layed flat in his kennel and could be washed, plus for some reason he didn't tear it up. Yay!


Problem was, my daughter Cadie loved to play with that dog bed just as much as the dog did. So then I thought of making one for her and adding the pillow part so she could lay on it to watch her favorite movies and such.


It was my husband who suggested the straps so we could roll it up and put it away in the closet. This really helps with the confusion of dog's mat vs.kids' mat, because of course the dog will lay on any mat he sees. And it just turned out that the straps wrap nicely around the creases in the mat so its really easy to roll up and stick closed with the velcro on the straps.


Fabricworm was sweet enough to give me the fabric for this particular mat. It's from the Jay-Cyn Commute line, which is so dang cute. I love how the geometric pattern on the print was echoed in the puffy squares on the mat. This little play mat has also been selected for inclusion in the next One Yard Wonders book (number three already!) which will come out sometime next year, I think.


Okay, I promised some along-the-way pics so here's me sewing the first lines over the 'bag' which will become the mat. 


And here I am stuffing the poly-fill in. Nothing too hard or fancy here. The pattern will give you all the measurements so you won't have to guess about how much to cut or where to draw your lines.


This is the final step, sewing closed the opening on the pillow. No hand sewing in this pattern (although you could do some if you love it so). For something that's going to end up on the floor, I don't think it hurts to use the pinch and stitch method.


Thanks so much for reading our first blog post all the way to the end! Now go sign up for the newsletter (if you haven't already) so you can get this Toddler Nap and Play Mat Pattern. If you've made one already, please share pics with us in our flickr group. If you have a blog and might be interested in guest posting here, send me an email.

Happy sewing,